![]()
EXTERIOR DOOR INSTALLATION
1-14-11
 |
 |
|
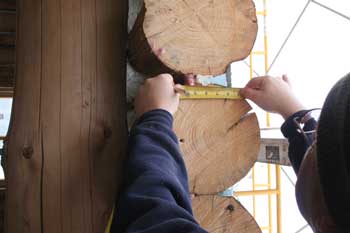
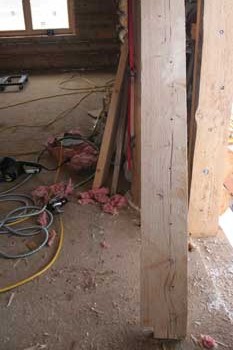
Bob measured the width at each mortar joint and transferred his figures to a sketch on the back of the buck. This helped us lay out the path for the channel we needed to cut on the back of the buck. Notice the mortar joint cross-section. From right to left we have mortar, foam board, spray foam, and batting. We still need to add foam board and mortar on the inside to make the cross-section complete. |
For the channel to be completely hidden, it would have to snake around the lag bolts (indicated by the holes in the buck above) while staying within the width of the mortar joints. |
|
 |
 |
|
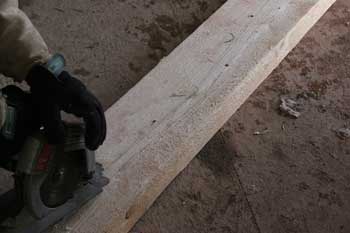
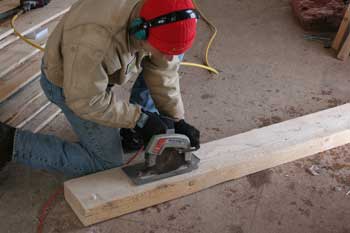
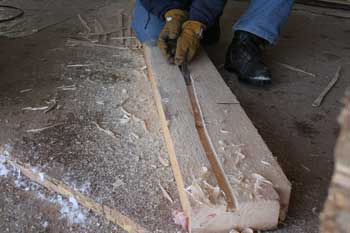
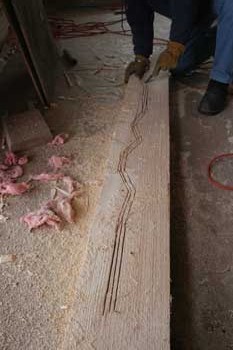
Jeff used the circular saw to make 3/4"-deep kerf cuts along the 3/4"-wide channel. |
Then the channel was cleaned out. |
|
 |
 |
|
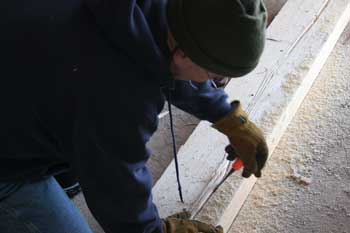
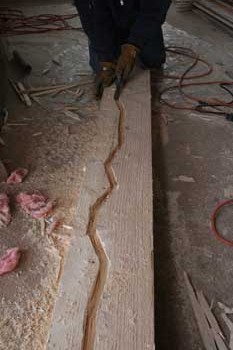
Next, Bob used a sharp chisel to level out the bottom of the channel. |
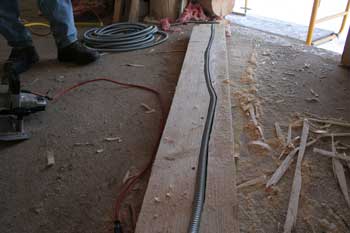
We then laid the flex conduit in the channel for a rough fit. |
|
 |
 |
|
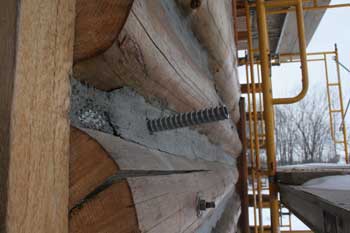
Chiseling out and angled notch where the flex conduit will make the bend from the buck into the mortar joint. |
The notch is necessary because the flex conduit only has a bending radius of about 6 inches. The buck is up against the logs again for a test fit. Looks good! |
|
 |
 |
|
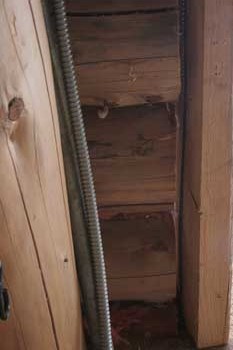
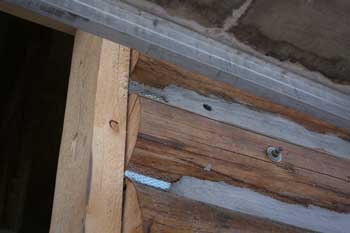
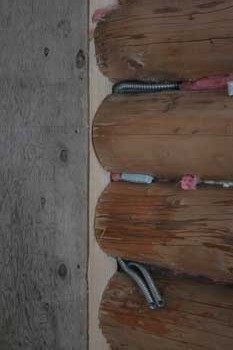
Here's a look at the bottom three logs with the buck pulled away from the logs so you can see the conduit in its channel. We drilled a hole through the 1st course log into the basement. The conduit feeds down through the hole at the bottom of the buck. |
Now to get the conduit through the mortar joint. We've punched a hole through the mortar with a screwdriver. We were surprised that no extra mortar broke off. Good thing we used the lath to hold the mortar together. |
|
 |
 |
|
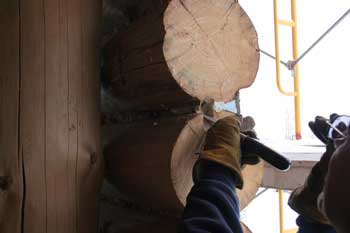
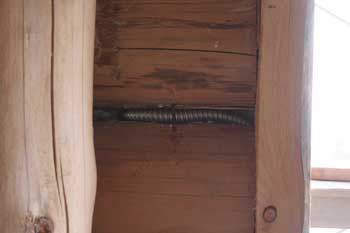
Looking at the hole in the mortar on the outside of the house. |
We then fed the flex conduit through the hole, leaving about 6" on the outside. |
|
 |
 |
|
On the inside of the joint, we drove a nail into the lower log behind the conduit, then bent it up to the upper log to hold the conduit in the joint. We'll be chinking the inside of the walls soon, which will cover all of this up. |
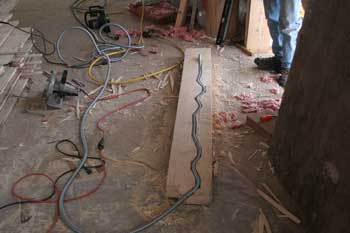
On to the second buck. This one will be trickier since this side of the door will have the switch box. Here you can just make out the sketched path of the channel we need to cut. |
|
 |
 |
|
There are a lot of curves in the channel in order to keep it hidden. This is because the vertical alignment of the logs on this side of the door is farther off. The kerf cuts have been made... |
...and Bob is just about finished cleaning out the channel with his chisel. |
|
 |
 |
|
The flex conduit fit is good. Here you can see how the channel takes an approximate 45-degree angle at the bottom of the buck. This is the angle at which Jeff will drill the hole into the basement. |
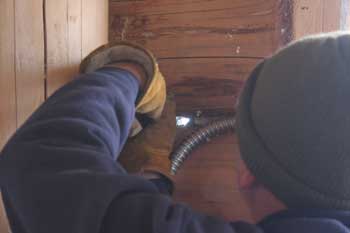
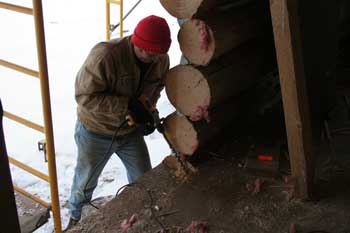
Here he goes. Using a 1" auger bit, Jeff drills the hole through the 1st course log into the basement. Both holes come out in the floor joist bays in the basement ceiling. |
|
 |
 |
|
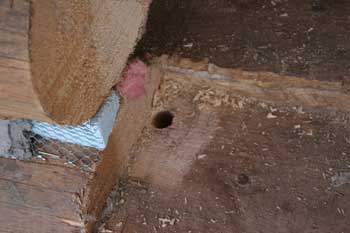
Here's a closeup of the hole. A couple of measurements lined it up perfectly with the bottom of the channel in the buck. |
The buck is back in place and bolted to the logs again. The upper conduit comes out of the buck channel and feeds through the chinking to the outside. Two joints down is where our switch box will go. The plywood is also back in place, which means it's time to go home. |
| <-- BACK TO "Winter 2010-2011 Projects" |
BACK TO OUR LOG HOME MAIN PAGE
If you have any questions about this website, e-mail us at stargazer@stargazerpics.com.
HOME | aurorae | moon & lunar eclipses | night sky shots | landscapes | animals unique shots | our wedding | Alaska 2006 | our log home | Stephen | Oliver | Alistair |
These pages and their contents Copyright © All Rights Reserved.