![]()
DECK/PORCH
10-26-12
 |
 |
|
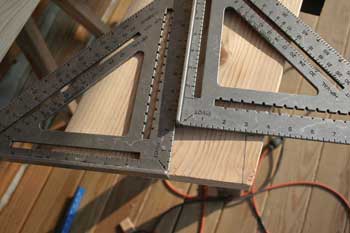
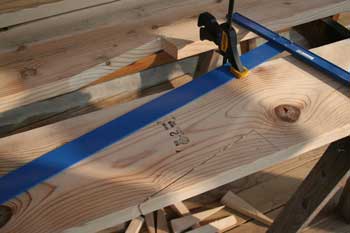
| For each rafter, the angle at the ledger was determined first and cut on the miter saw. Then, we measured down from the top edge of the rafter for the hangar bracket notch cut. | Then, we marked off the bracket shelf depth... | |
 |
 |
|
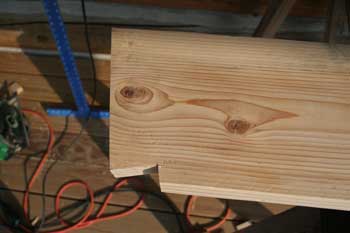
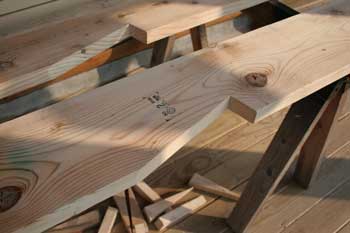
| ...and squared off the front of the notch. | The bracket notch. | |
 |
 |
|
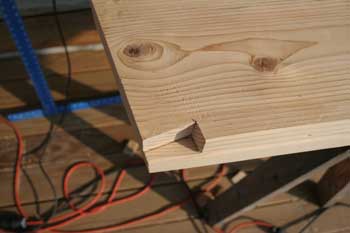
| After the birdsmouth notch was cut for the header, this rafter was laid on top of its mate for tracing. | The birdsmouth notch traced. | |
 |
 |
|
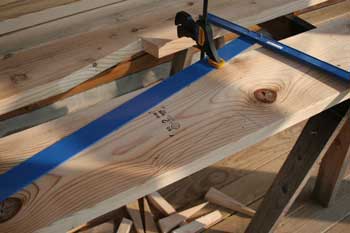
| We clamped the drywall square to the rafter to use as a guide for the circular saw when cutting the birdsmouth. | Both legs of the notch were cut with the circular saw first... | |
 |
 |
|
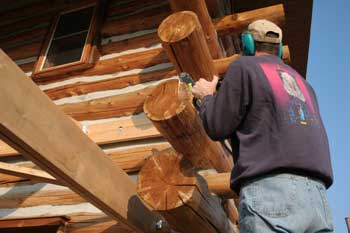
| ...then finished off with the jigsaw. | The southern-most rafter lines up with one of the westward overdangles, so we had to carve part of it out. | |
 |
 |
|
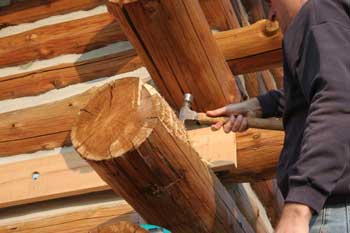
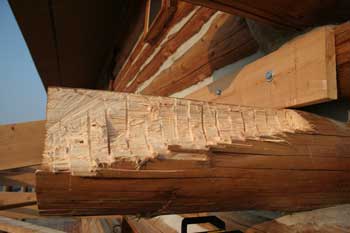
| Jeff started by outlining the rafter position on the overdangle, then making a row of kerf cuts. | This is the same method we used to carve out the header and sill logs for the windows and doors. | |
 |
 |
|
| Then he knocked out the pieces between the kerf cuts. | He then used the tip of the chainsaw to cut out the inside of the notch. | |
 |
 |
|
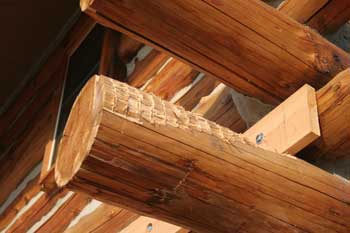
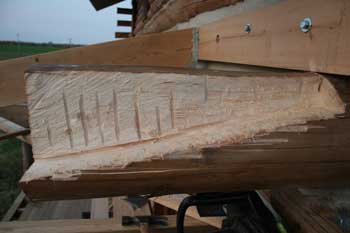
| Here's the rough notch showing the pitch that the rafter will follow. | Lastly, using the chainsaw tip again, Jeff cleaned up the notch and gave it a more defined shape. | |
 |
||
| After painting the exposed notch with a waterproof stain, we set the final rafter. |
| <-- BACK TO "Fall 2012 Projects" |
BACK TO OUR LOG HOME MAIN PAGE
If you have any questions about this website, e-mail us at stargazer@stargazerpics.com.
HOME | aurorae | moon & lunar eclipses | night sky shots | landscapes | animals unique shots | our wedding | Alaska 2006 | our log home | Stephen | Oliver | Alistair |
These pages and their contents Copyright © All Rights Reserved.