![]()
FRAMING & DRYWALL
11-7-11
 |
 |
|
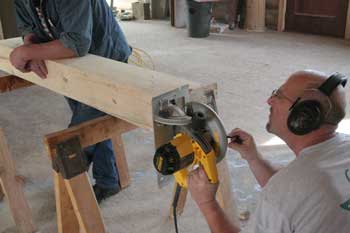
| Cutting a kerf in the bottom of the beam, marking the top edge of where the bracket will sit. | Removing 5/16" from the end of the beam so the 5/16"-thick steel bracket will be countersunk against the beam. | |
 |
 |
|
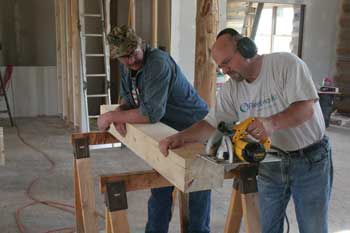
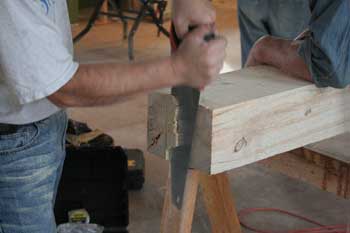
| Removing the last bit with the hand saw down to the kerf cut. | With the beam rotated 90 degrees so the bottom side is up, Bob uses the "wheel of death" (or the lancelot) to round off the edge to match the profile of the bracket. | |
 |
 |
|
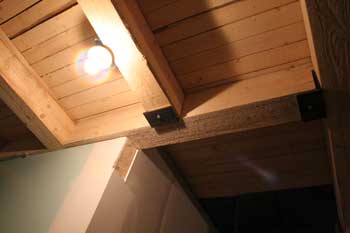
| Paul passes the beam up to Bob. Notice we already have another bracket bolted on at the mid point. | The other bracket, which will be countersunk against the end of the beam (right end in this picture), is already bolted to the floor joist beam. | |
 |
 |
|
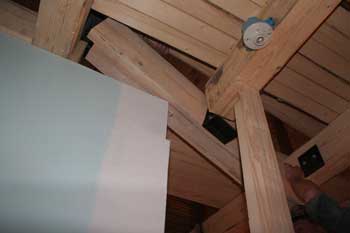
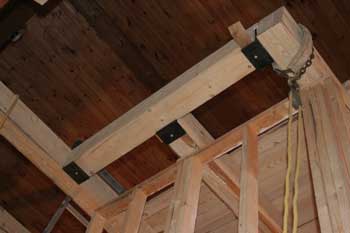
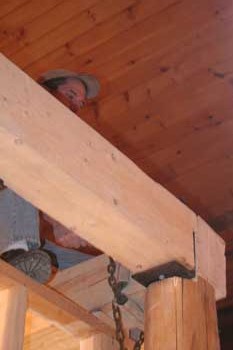
| Our beam is up and in place. One 3/8" lag screw is used up throught the bottom of the brackets to ensure stability at the intersections. | Here's a view of the second beam we put up over the stairwell so we could remove the temporary wall. The only thing missing is the log support that needs to go in the corner, where the chain and pulley are. | |
 |
 |
|
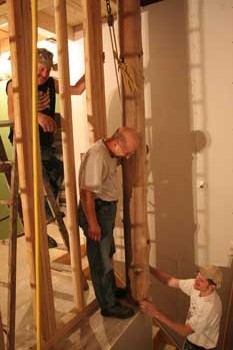
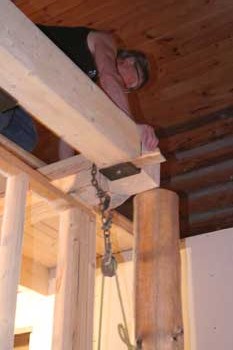
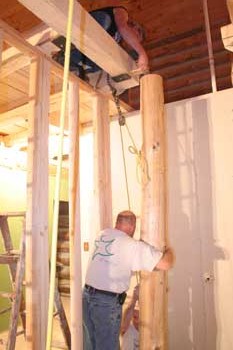
| First we brought our post inside and stood it up at the inside corner of the stairwell using the pulley. | With a shim driven between the bottom of the beam and bracket to align the top with the adjacent beam, the post is ready to be cut down to exact height. | |
 |
 |
|
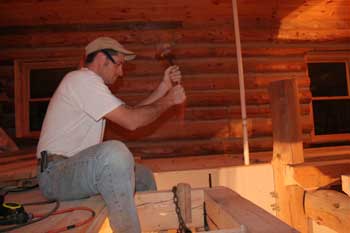
| Jeff works the pulley to pick the post up a bit while Bob keeps it from tipping. Paul used the chainsaw to shape the top of the post... | ...to match the bottom of the beams and bracket. | |
 |
 |
|
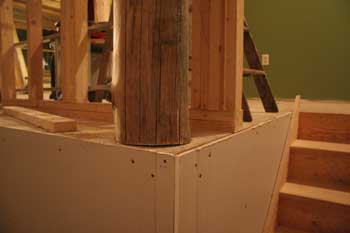
| Then, just like old times, Jeff drove a rebar pin down through the joist beam and into the log post. | Bob secured the base of the post with some long screws up through the floor and into the bottom of the post. |
| <-- BACK TO "Fall 2011 Projects" |
BACK TO OUR LOG HOME MAIN PAGE
If you have any questions about this website, e-mail us at stargazer@stargazerpics.com.
HOME | aurorae | moon & lunar eclipses | night sky shots | landscapes | animals unique shots | our wedding | Alaska 2006 | our log home | Stephen | Oliver | Alistair |
These pages and their contents Copyright © All Rights Reserved.